

There are a few ways that we can make a screen sharing connection.

Messages
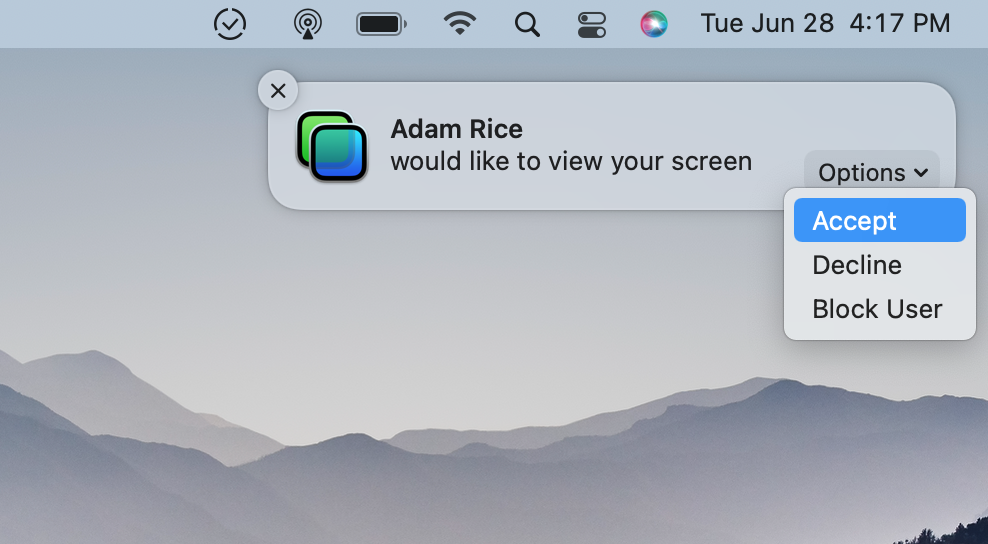
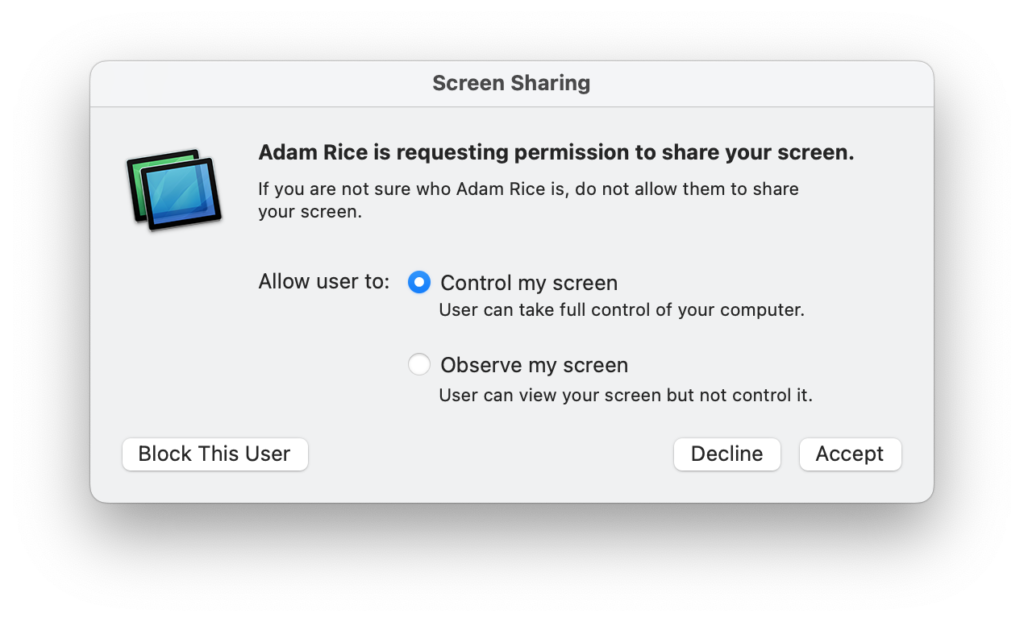
If you use the Messages app on your Mac, I can send you a screen sharing request. This is quick and doesn’t require any setup — I just need to know your iPhone number or your Apple ID email address.
One quirk of using Messages for screen sharing is that it opens up an audio connection between our Macs. If we’re already on a phone call, I’ll ask you to turn your computer volume all the way down (and I’ll mute my microphone) so that we don’t get echoes and feedback.
Here’s what you’ll see:

Zoom
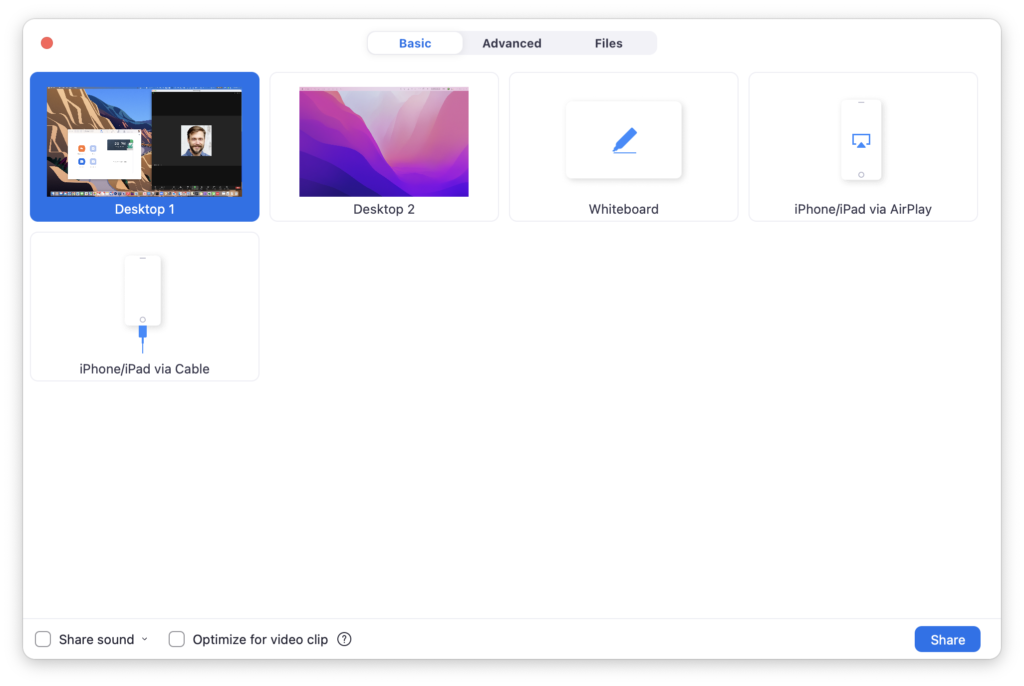
If we’re doing a Zoom appointment, Zoom has screen sharing built in. I’ll ask you to click the green “Share Screen” button, choose ‘Desktop 1’, and click the blue Share button, like this:


Acronis Quick Assist
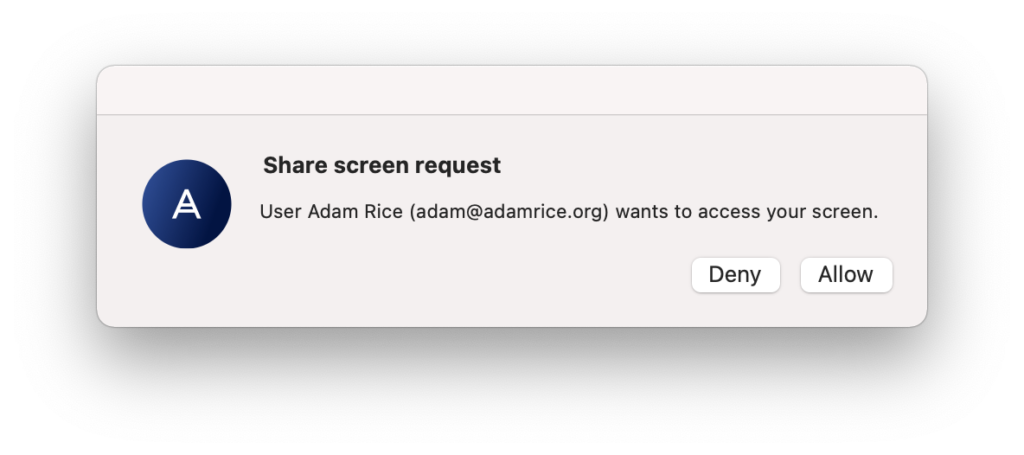
My dedicated screen-sharing tool is Acronis Cyber Protect Connect Quick Assist.1Or, as I like to call it, Cashel Boyle O’Connor Fitzmaurice Tisdall (This app used to be called Remotix — imagine the meeting in which a bunch of people debated a name consisting of a twelve syllables and said “sounds great 👍”.)
Download Acronis Quick Assist here:
https://www.acronis.com/en-us/products/quick-assist/download/
I just need to know your unique Computer ID in order to connect:

Unlike Messages, both Zoom and Acronis Quick Assist require some setup, described below.
macOS Permissions for Remote Support
macOS protects your privacy by preventing any app from seeing what’s on your screen or doing anything at all outside of the app’s own windows.
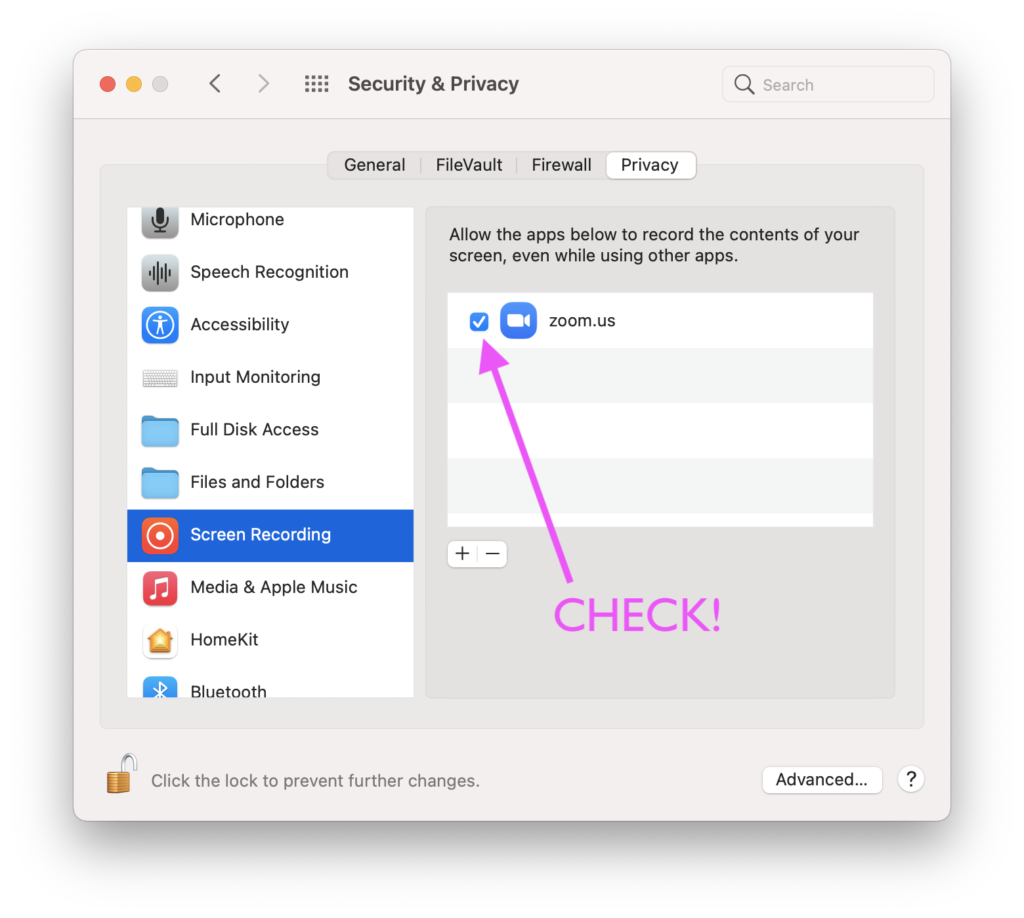
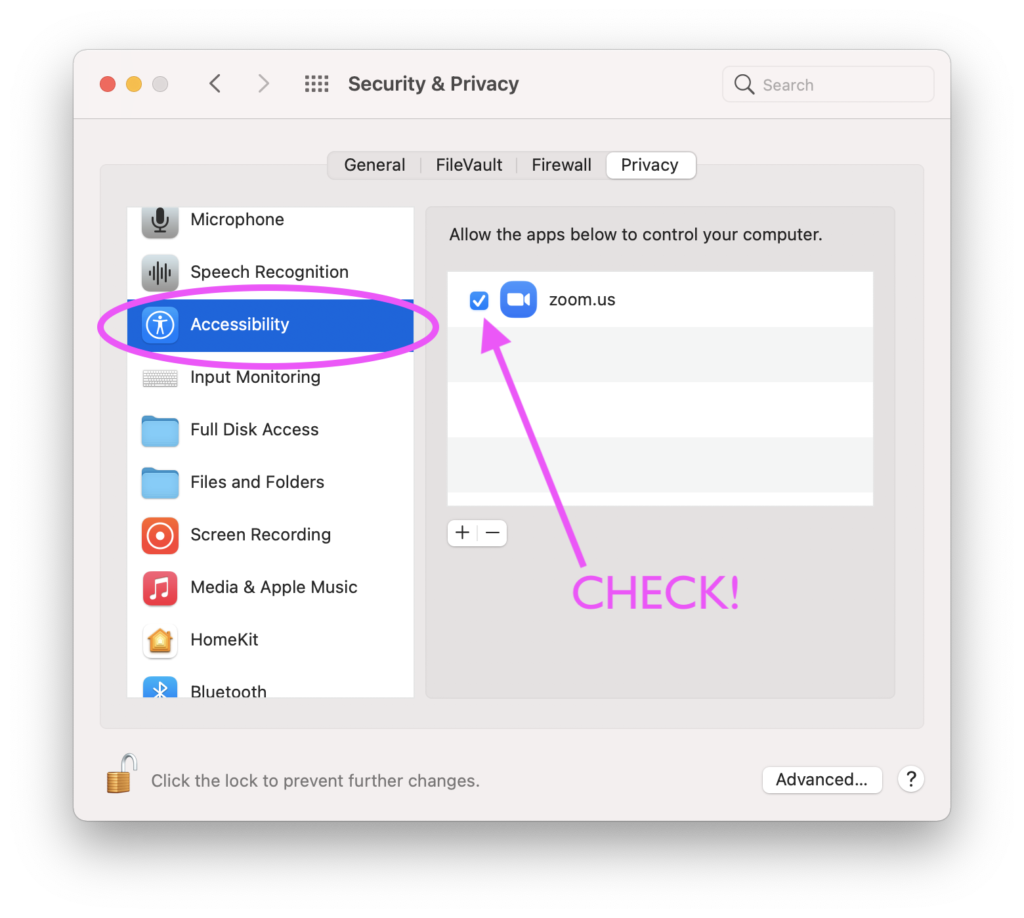
Both Zoom and Acronis Cyber Protect Connect Quick Assist will ask you to grant “Screen Recording”2Apple calls it “Screen Recording” when an app is allowed to grab what’s on your screen and show it to me, but there’s not actually a recording being made. I wish Apple had called this something else! and “Accessibility” permissions so that we can do what we need.
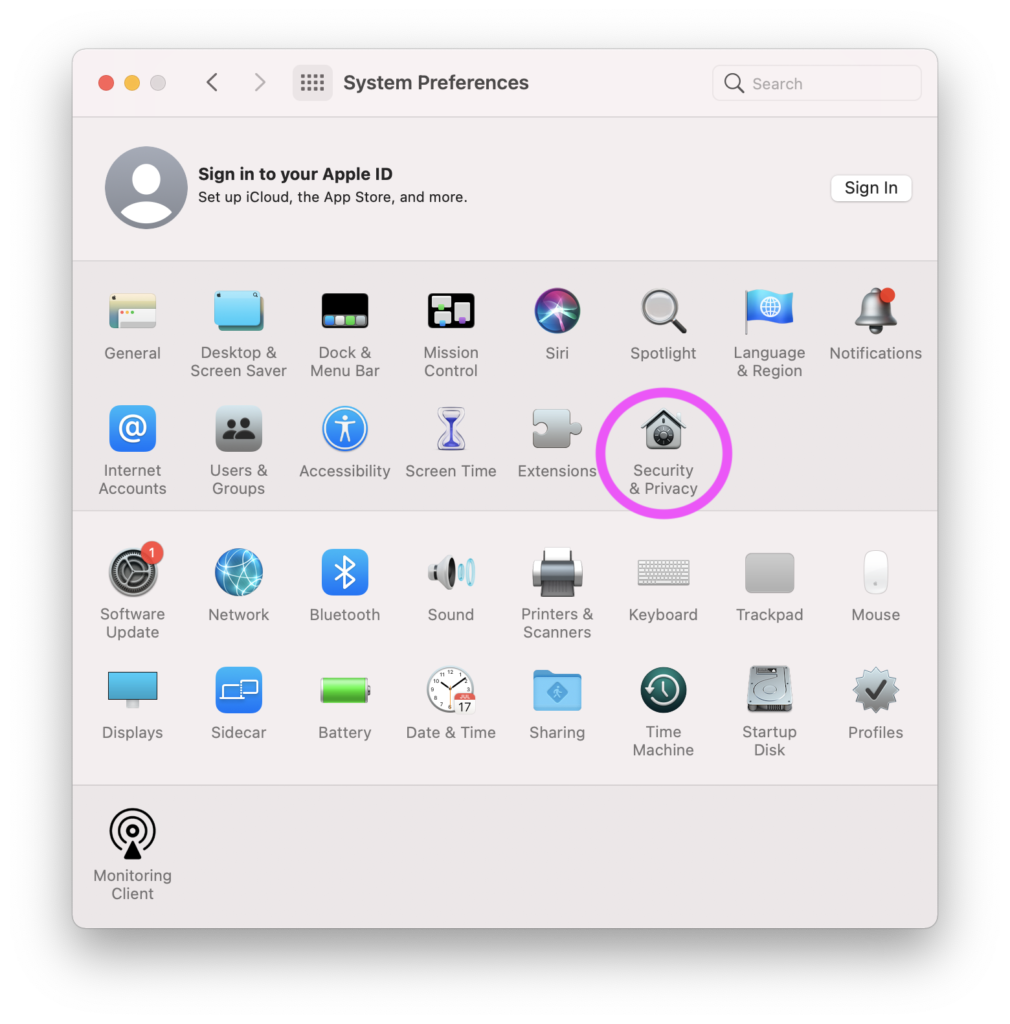
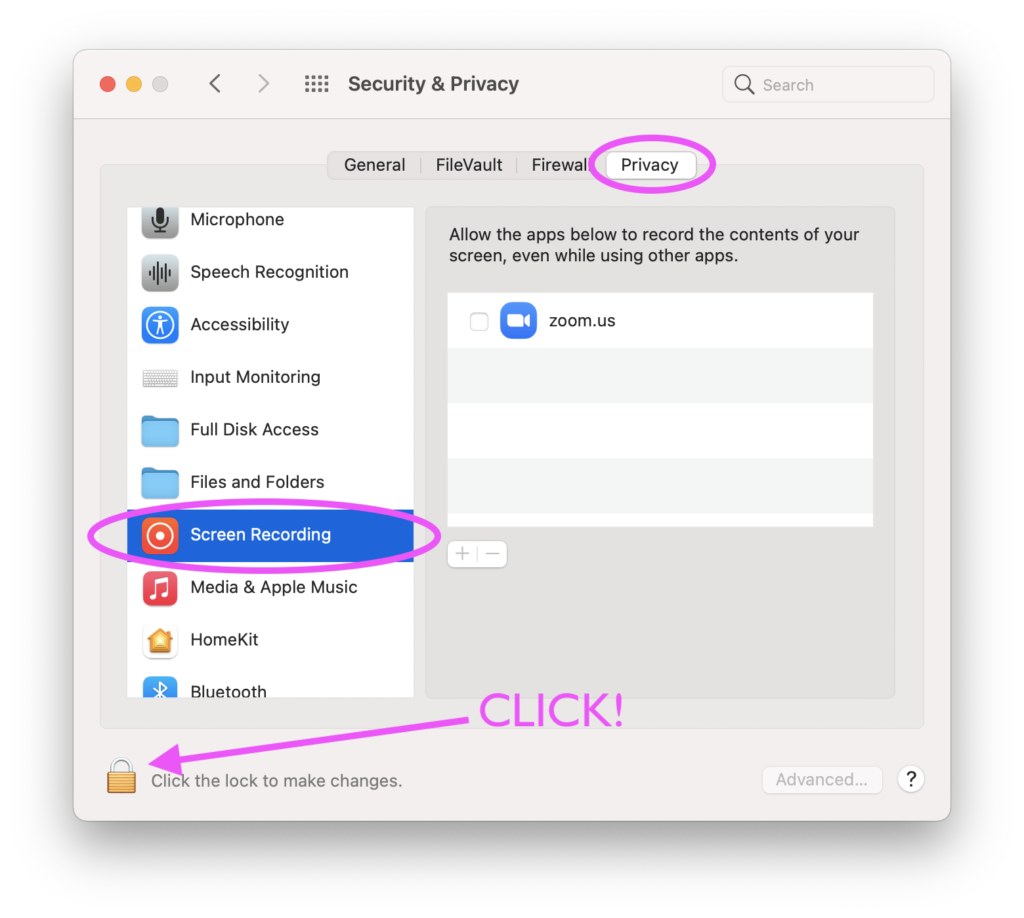
You’ll need to put a checkmark next to the app’s name in System Preferences > Security & Privacy > Privacy > Screen Recording and also in Accessibility. Here’s what that looks like:

If you’d like to see a video, this is a good short demonstration:
(Featured image by óskar elías sigurðsson, licensed under CC BY 2.0 / edited to remove watermark)